Node Benefits
In the process of constructing nodes, the role of benefits module is crucial. It is responsible for the management of the group, and can also obtain benefits such as fee reduction or exemption by locking the CRU. This article will elaborate on many aspects.
1 Group management
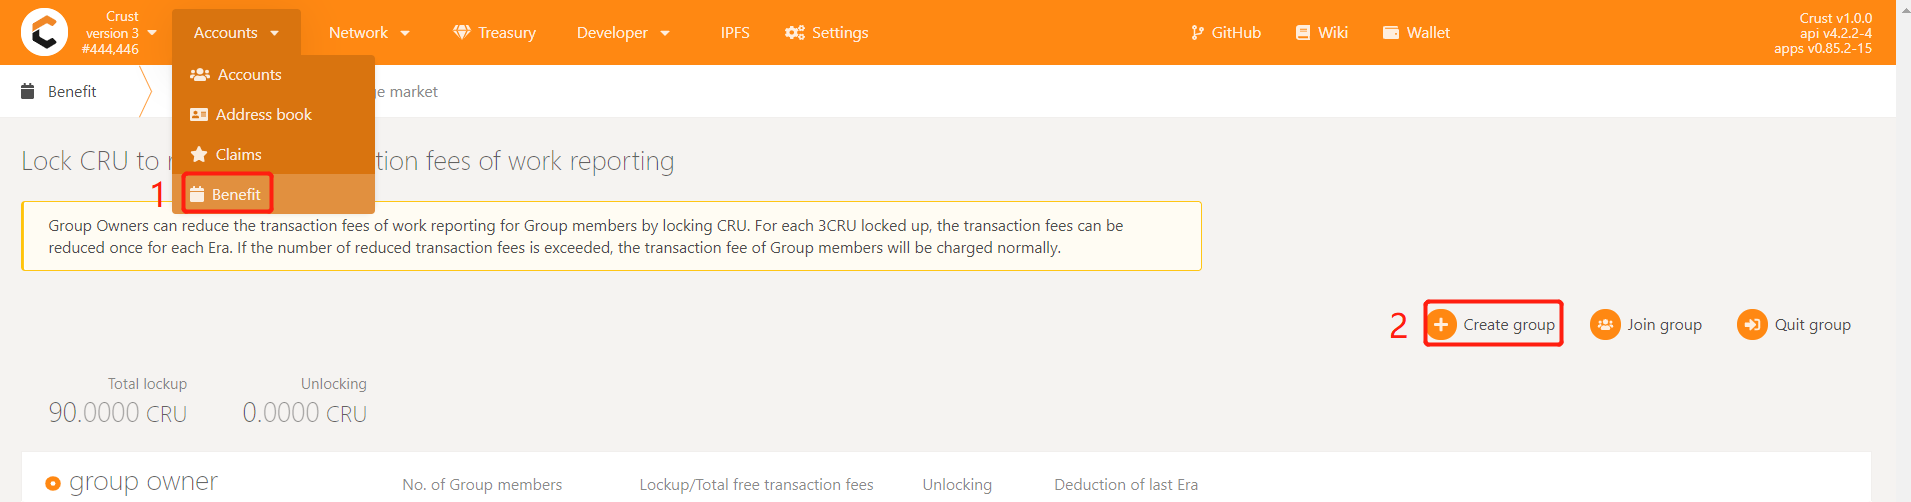
1.1 Create group
New bond is a prerequisite for creating a group,enter Crust APPS,select Account, select the benefits module and click "Create group"
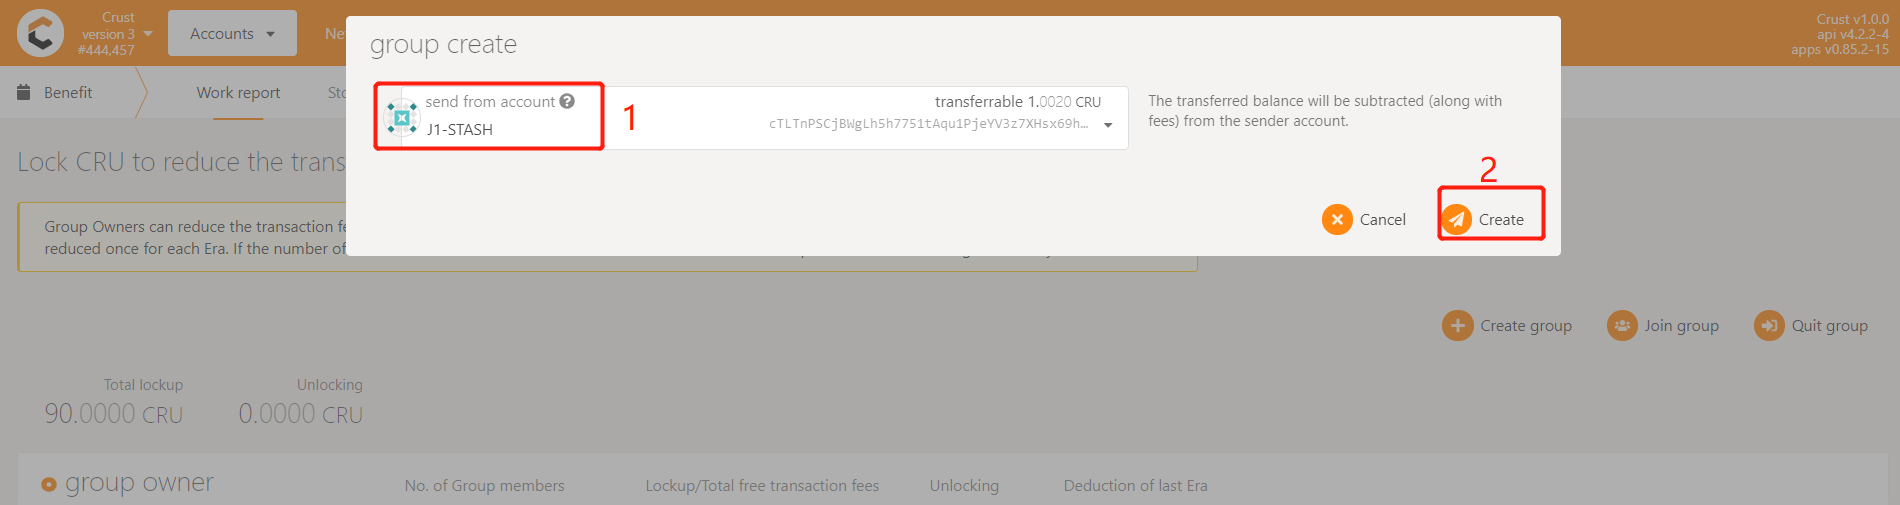
Select Stash account, click "Create"
1.2 Whitelist management
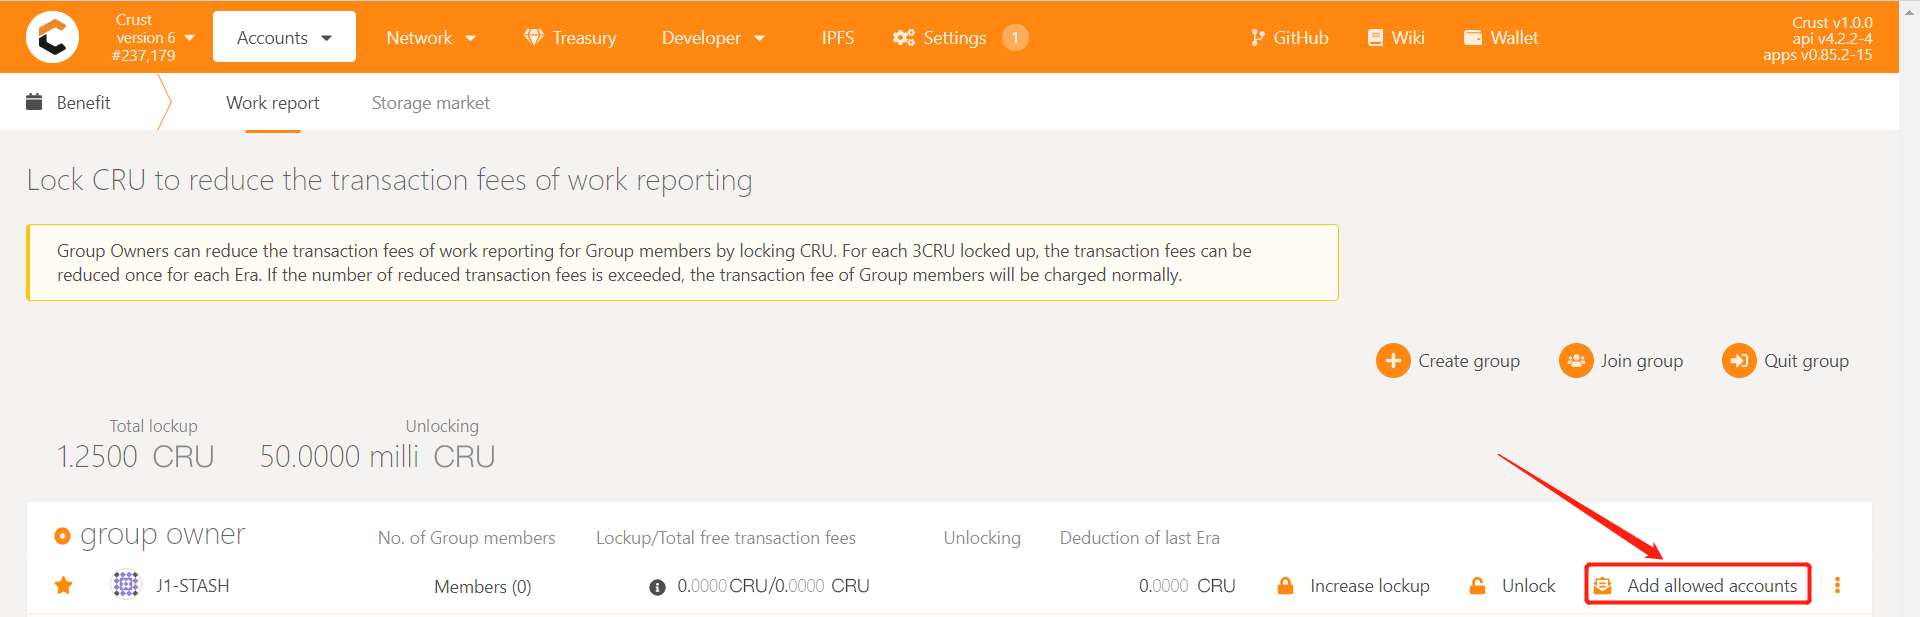
1.2.1 Add allowed accounts
Member accounts need to be added to the whitelist of the group before they can be added to the group, enter benefits module, in the corresponding group, click "Add allowed accounts"
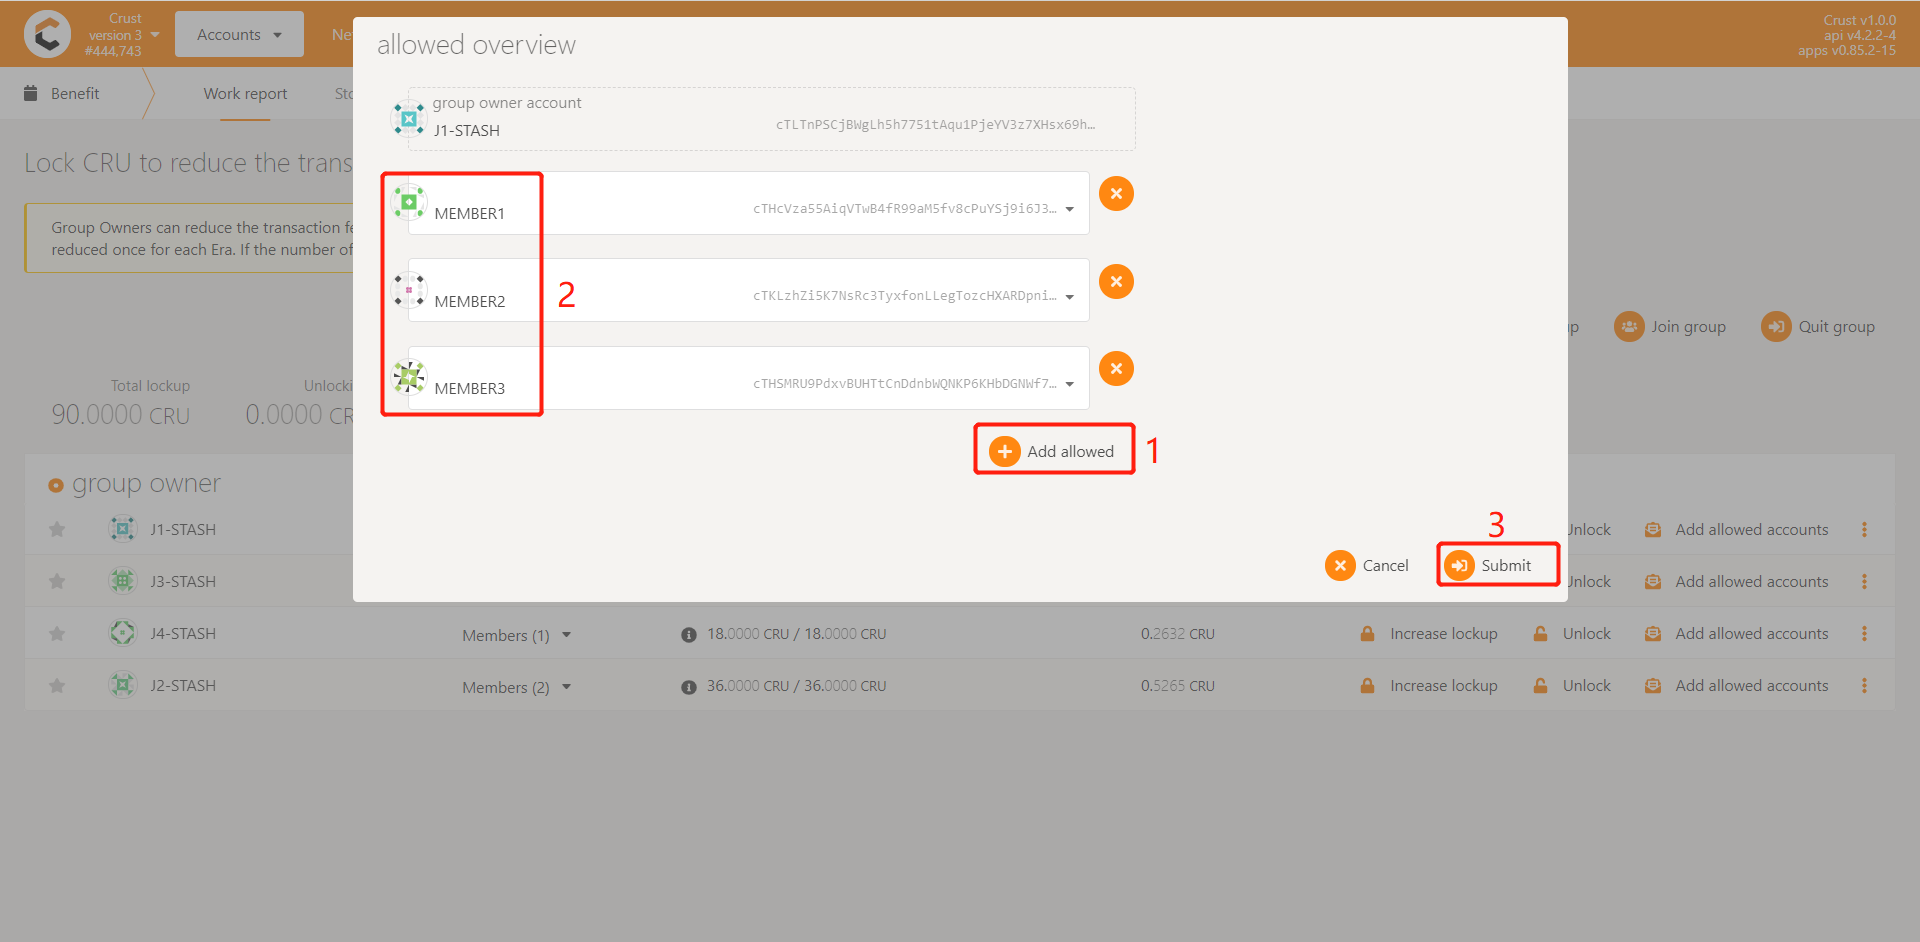
Click "Add allowed", select the target Member account, and click "Submit"
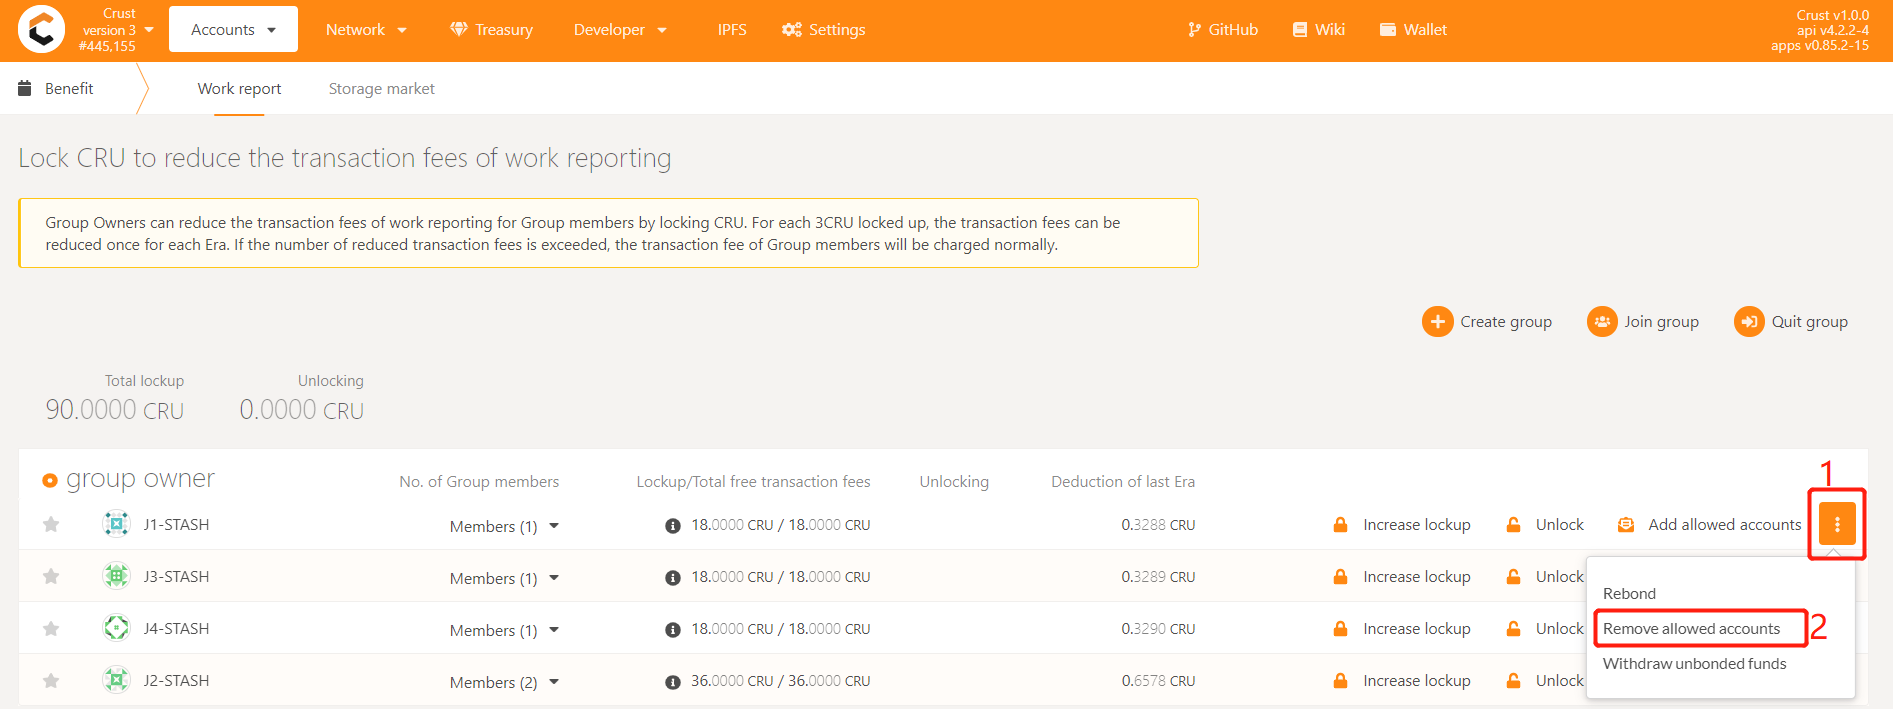
1.2.2 Remove allowed accounts
Enter Benefit module, in the corresponding group, click "Remove allowed accounts"
Click "Remove allowed", select the target Member account, and click "Submit"

2 Lockup CRU to reduce the fee of the work report
The reporting of the workload of the main network requires a handling fee. Under normal circumstances, each storage node (Member node, or Member identity in Isolation node) will perform 24 workload reporting transactions per day, which brings a lot of handling fee overhead. For this reason, the Crust network provides a benefits module, which can waive the handling fee for workload reporting.
Group owners or Isolation node managers can reduce or waive the workload report fees of storage nodes by locking CRUs. Each storage node can lock any number of CRUs for reduction or exemption. Locking 18 CRUs can reduce all workload reporting fees for one storage node. If the number of locked CRUs is less than 18, they will be reduced proportionally.
For example, if there is 1 Member in the Group and 9 CRUs are locked at this time, 50% of the daily workload report fee will be waived. For another example, if there are 2 Members in the Group and 9 CRUs are locked at this time, 25% of the daily workload report fee will be waived
In the group, because there will be multiple storage nodes, 18 CRUs need to be locked for each member for fee reduction. However, considering the stability of the workload reporting in the group, it is recommended to lock each member node 24CRU~30CRU to ensure that the handling fee is completely reduced.
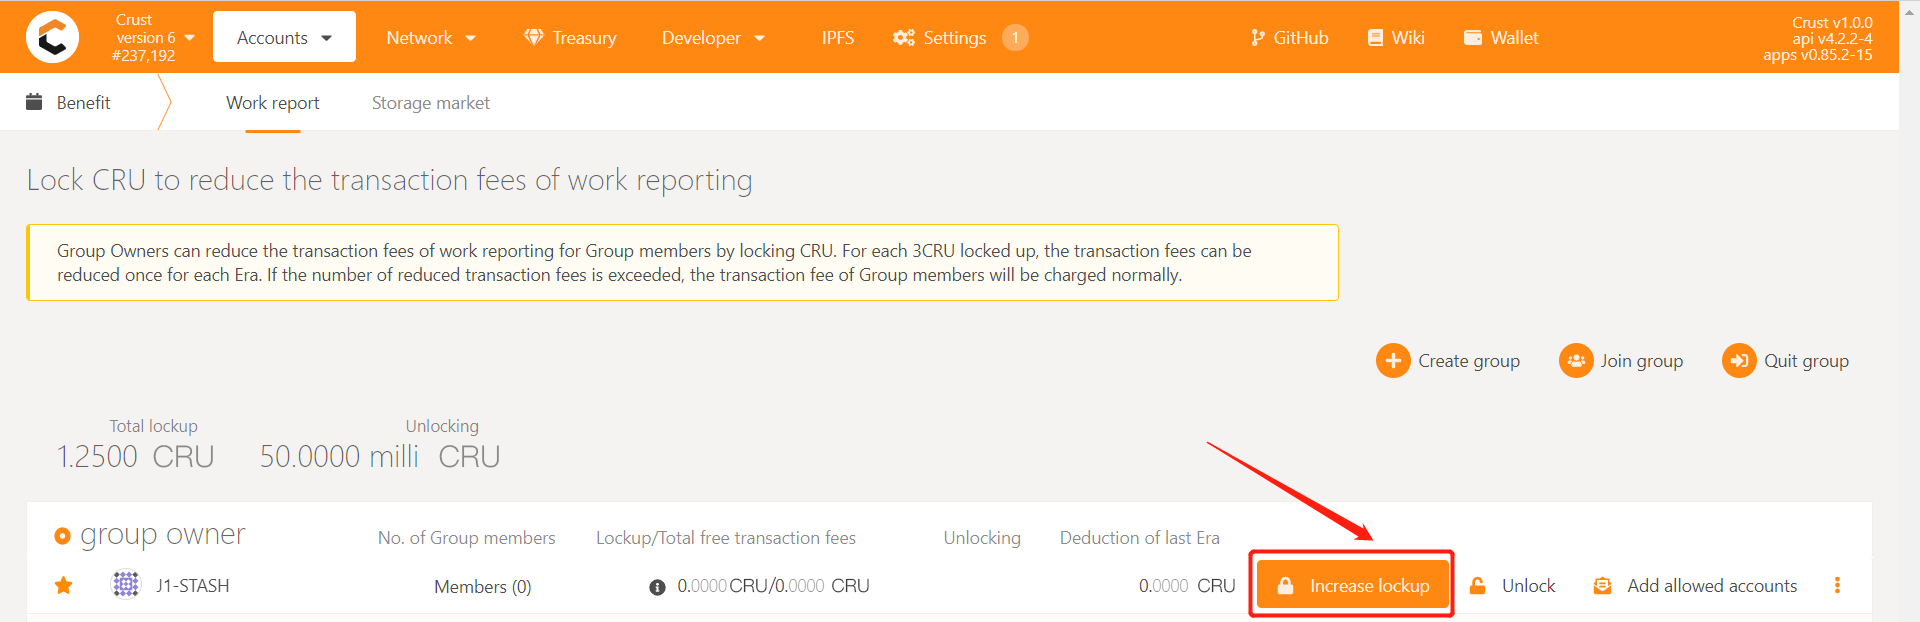
2.1 Increase lockup
The CRU can be locked to reduce the workload report fee of the Member node. Each Member node can lock any number of CRUs for reduction or exemption. Locking 18 CRUs can reduce all workload reporting fees for a Member node. For example, if the group has 3 members, 54 CRUs need to be increased lockup and ensure that the Stash account has 54 transferable CRUs
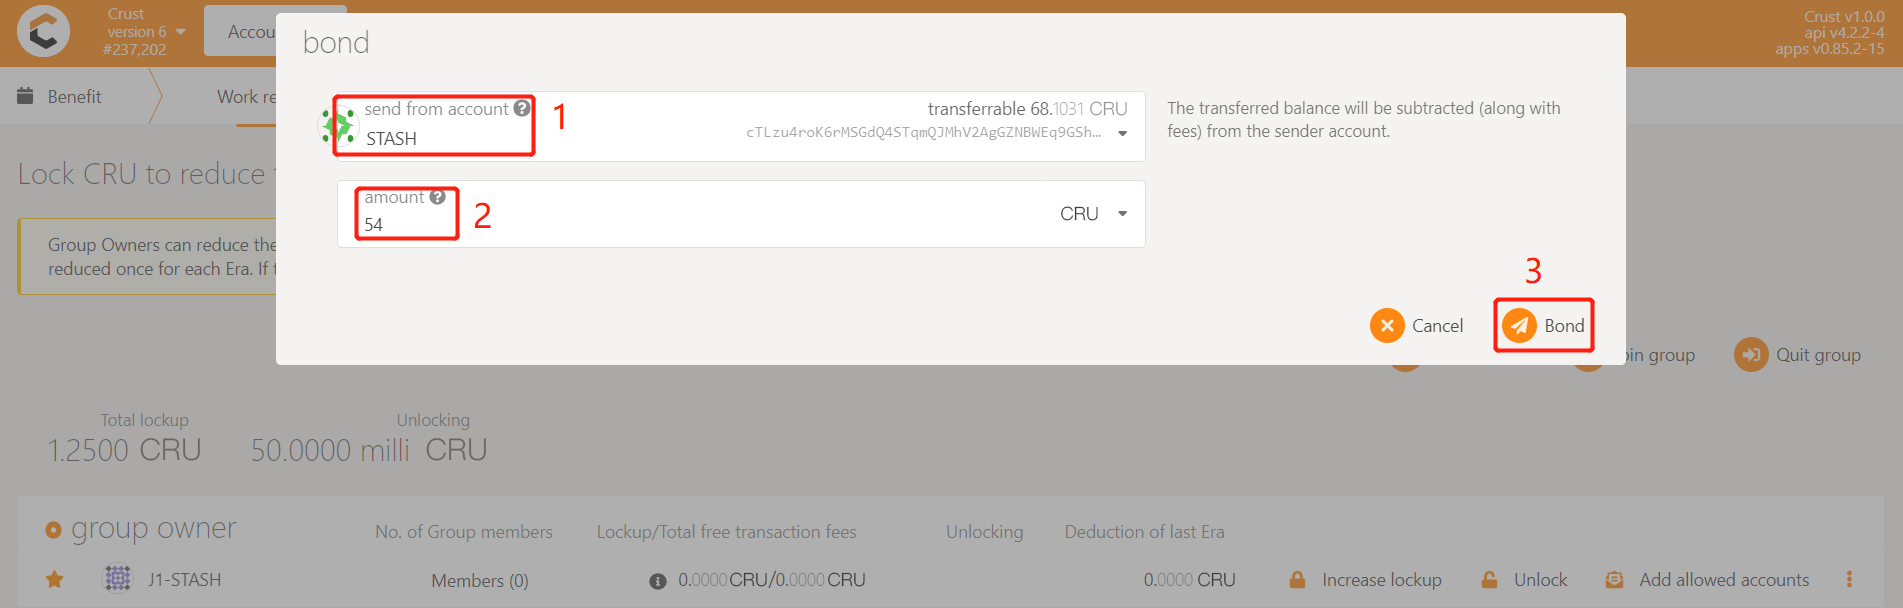
Enter benefits module, in the corresponding group, click "Increase lockup"
Select the Stash account of this group, enter the amount of locked position, and click "Bond"
2.2 Decrease lockup
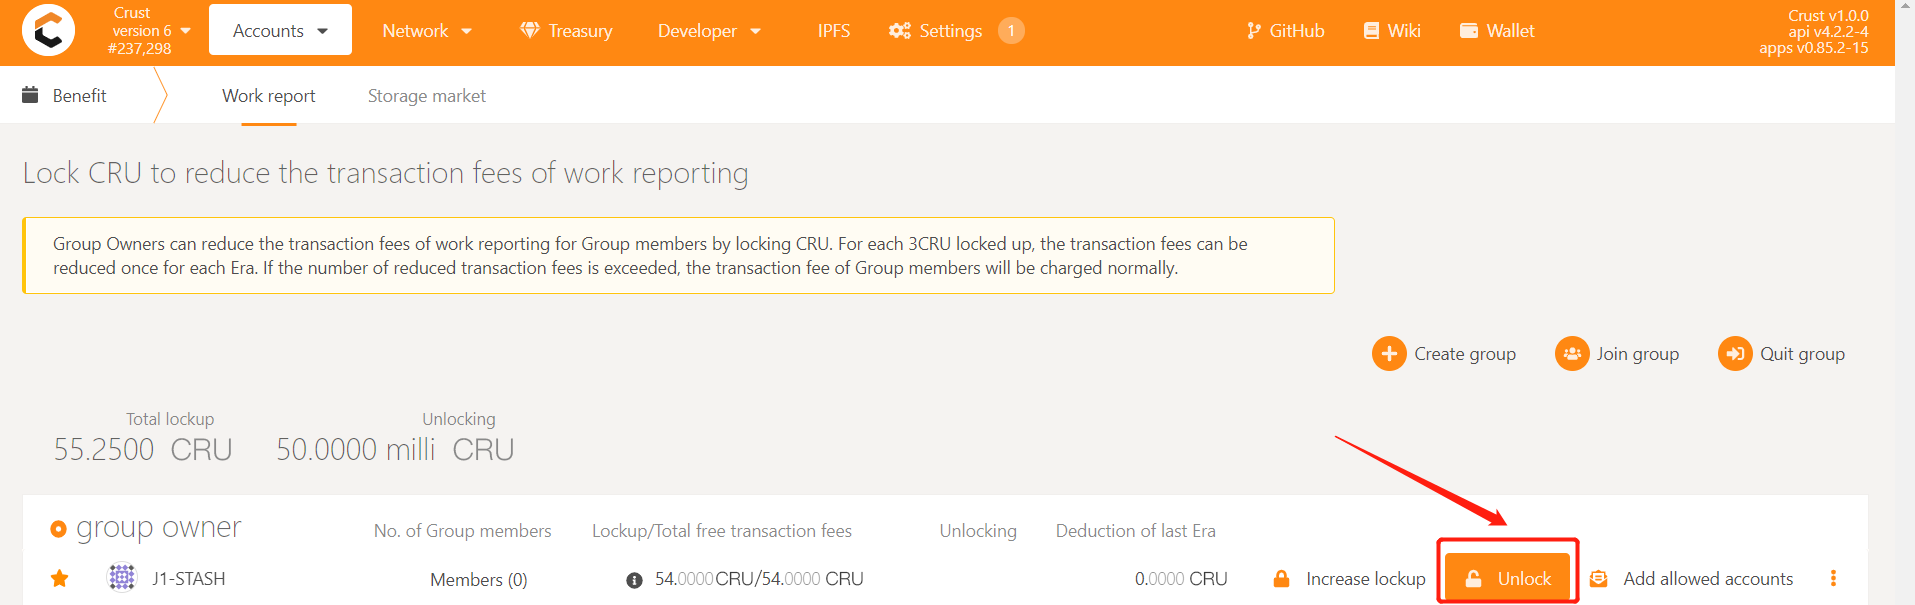
2.2.1 Unlock
Enter benefits module, in the corresponding group, click "Unlock"
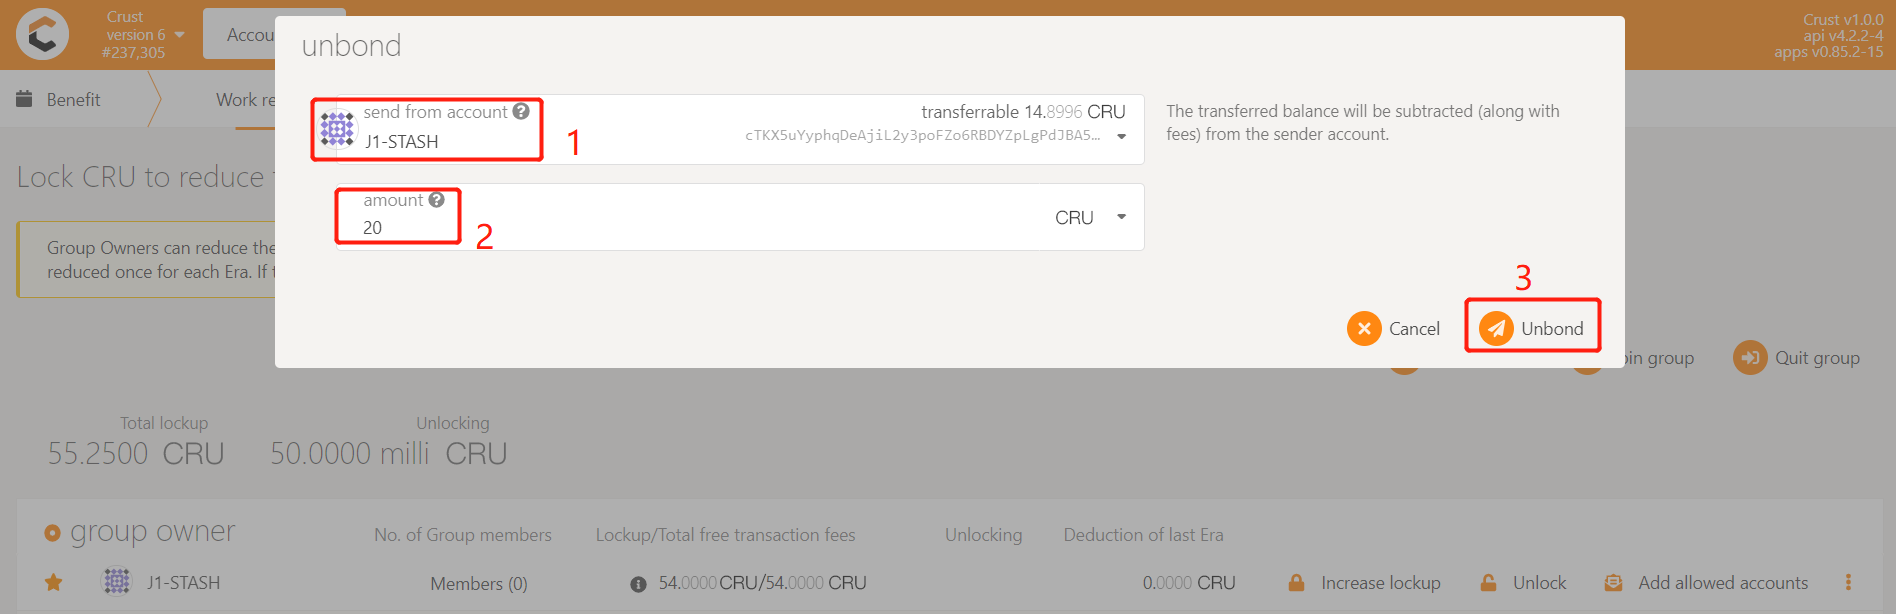
Select the Stash account of the group, enter the amount to be unlocked, and click "Unbond"
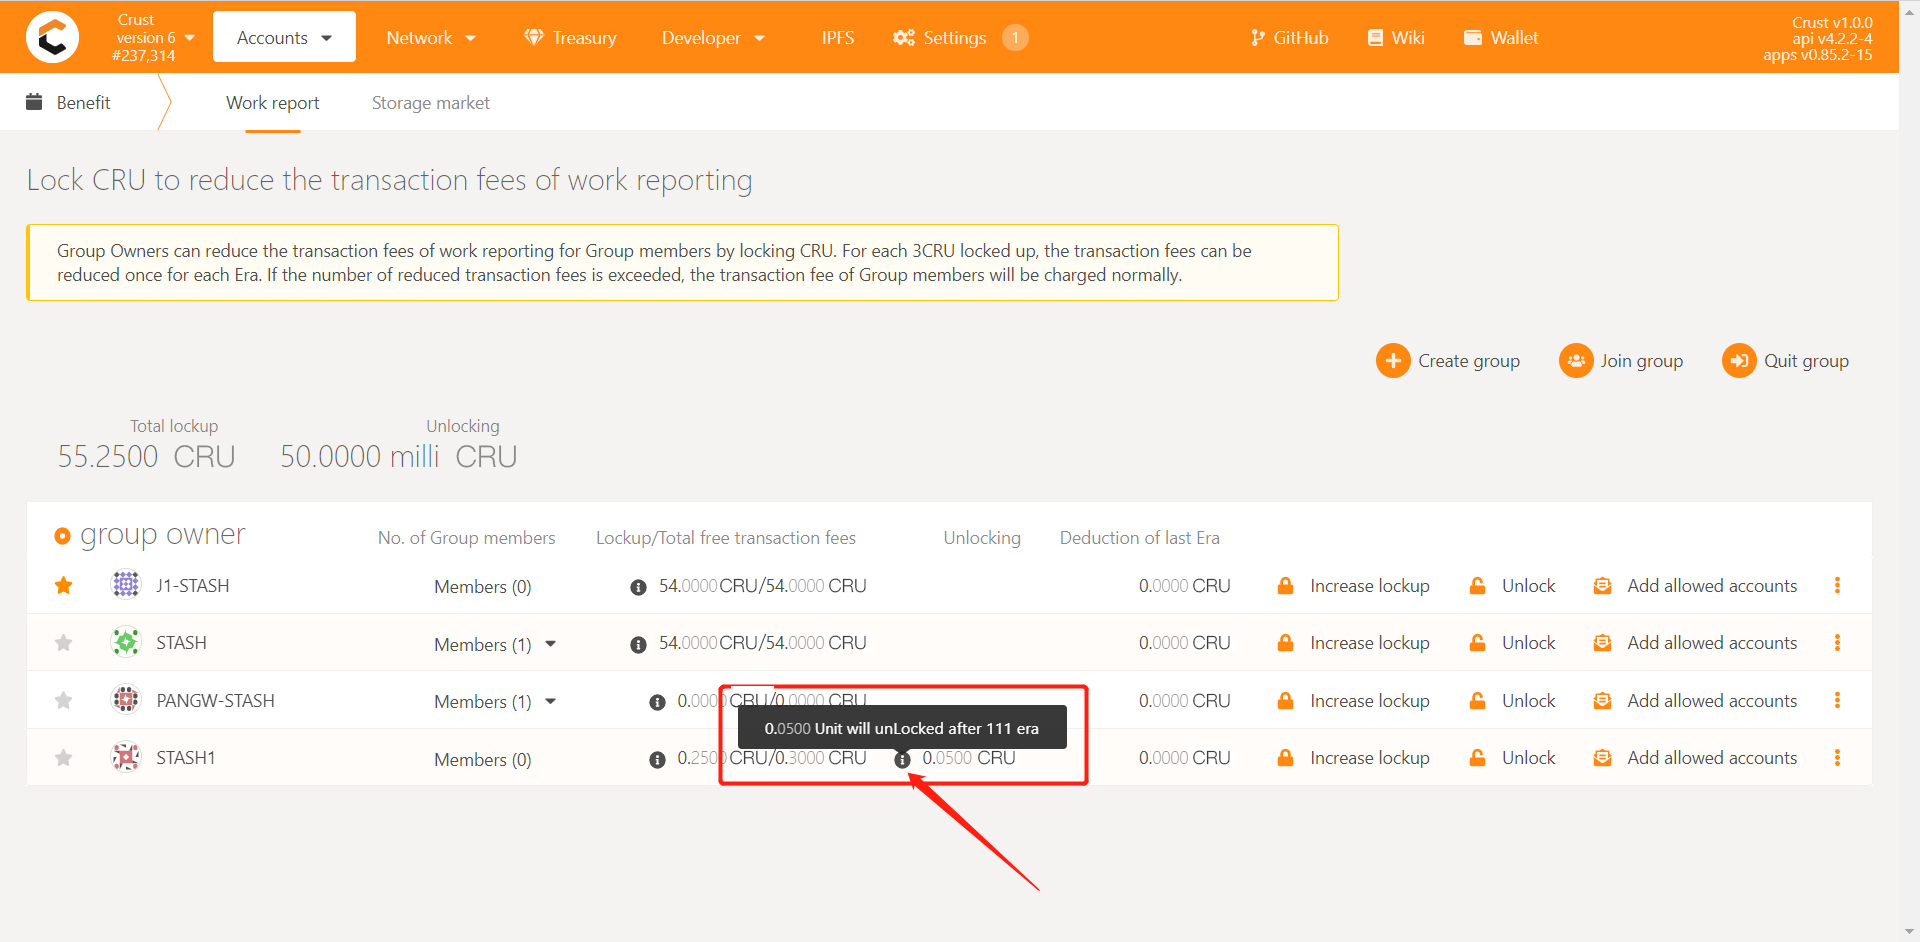
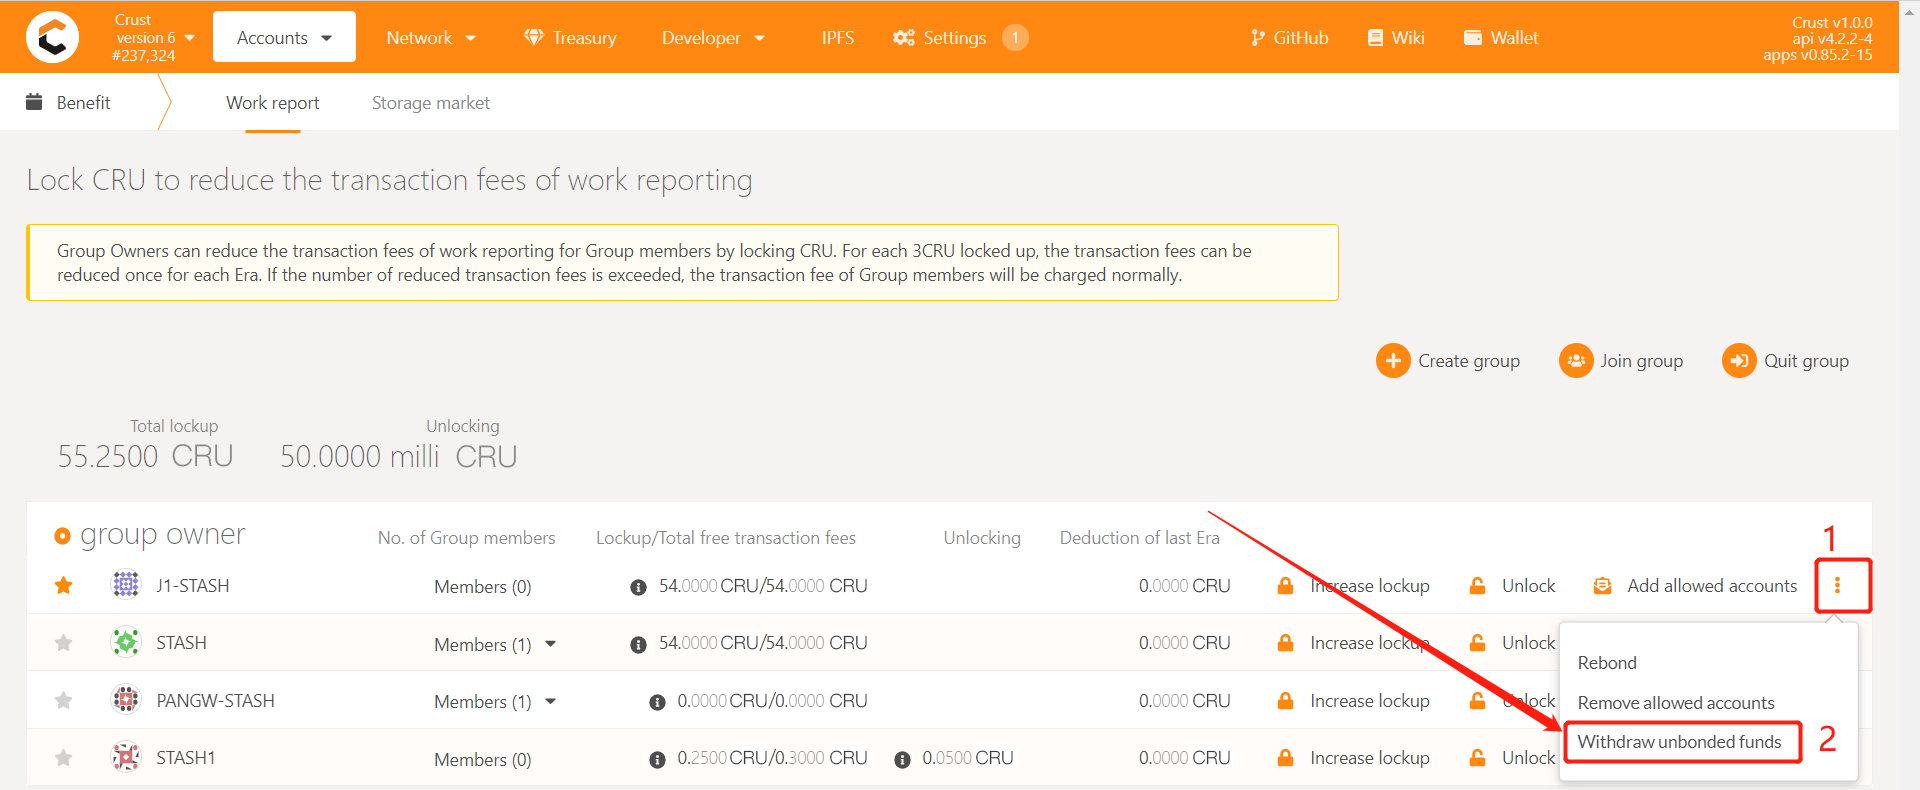
2.2.2 Withdraw unbonded funds
The unlocked funds need to wait for 112 eras before they can be withdrawn, you can click "!" to view the unbinding progress
If the unlocking time exceeds 112 eras, enter benefits module, in the corresponding group, click "Withdraw unbonded funds" to withdraw unlocked funds
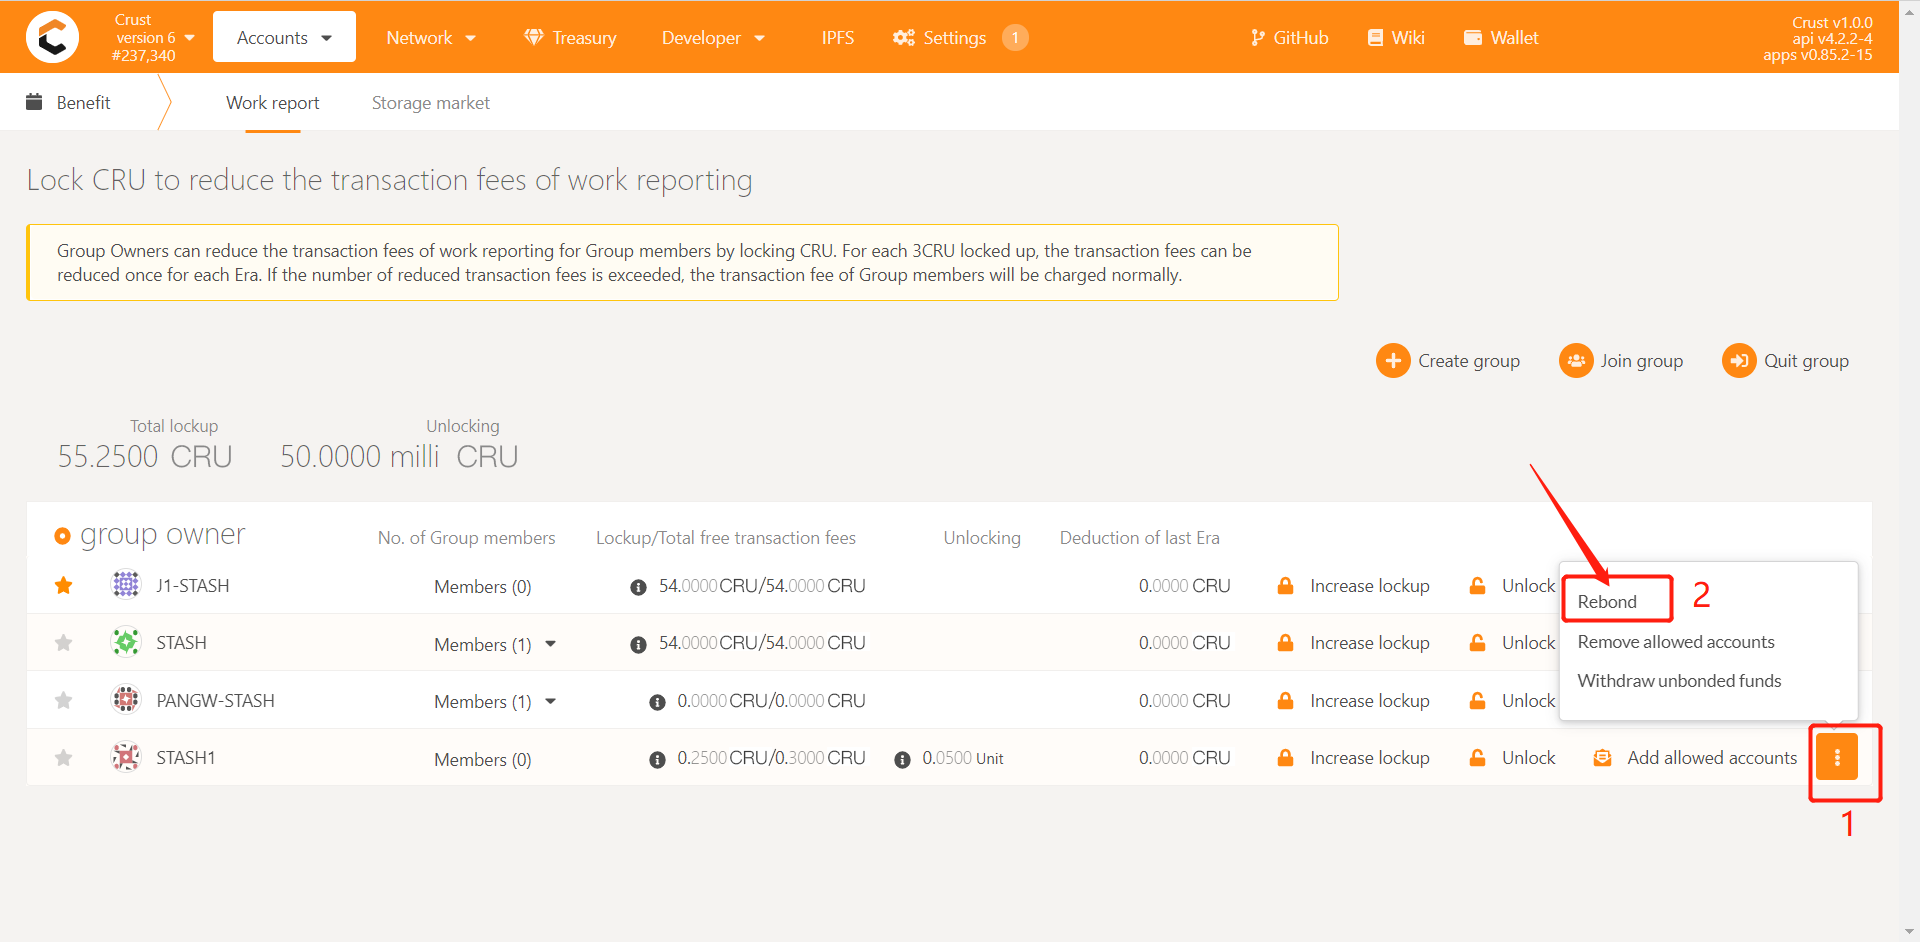
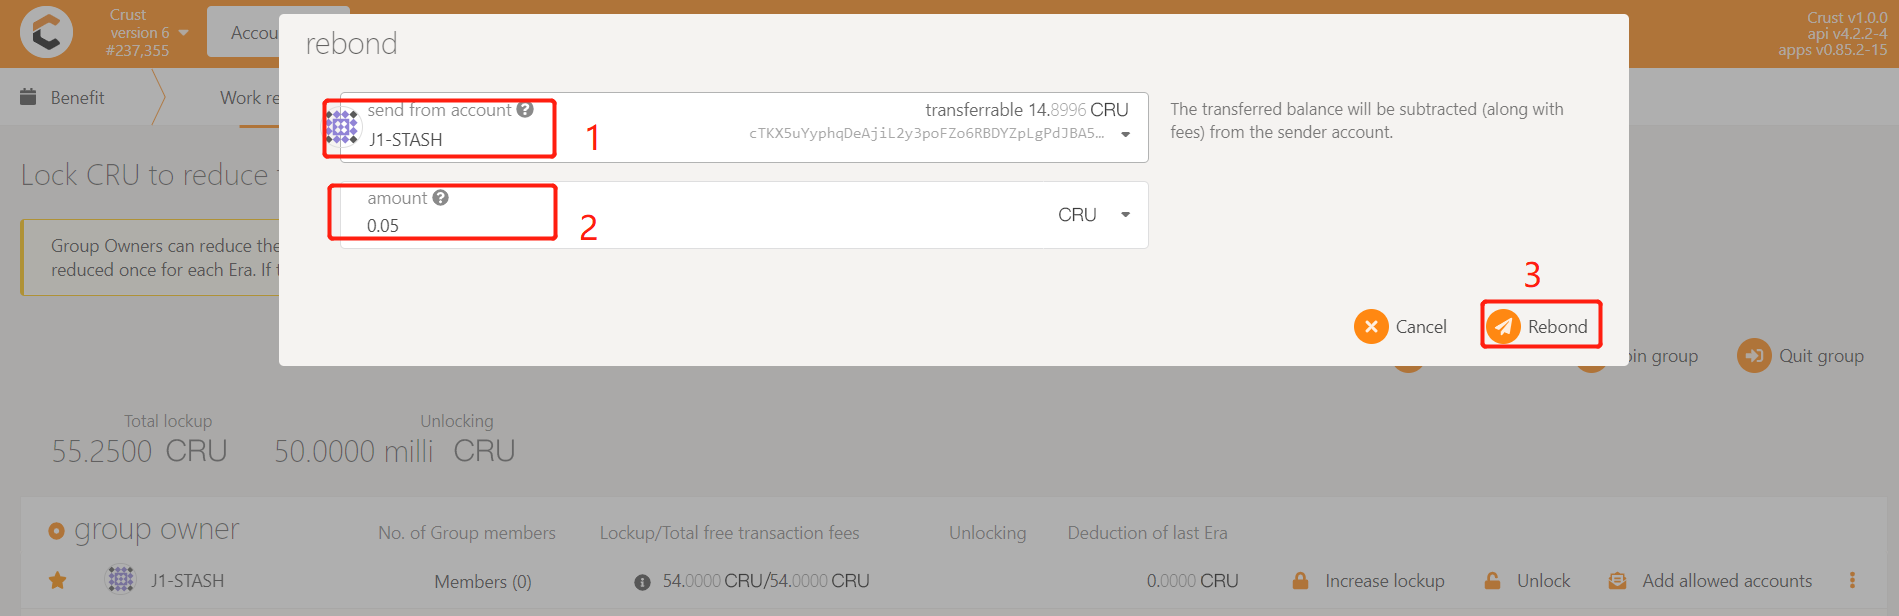
If you want to rebond the unlocking funds, re-use the membership fee reduction function, enter benefits module, in the corresponding group, click "Rebond" To enter the locked state
3 Member operation
3.1 Join group
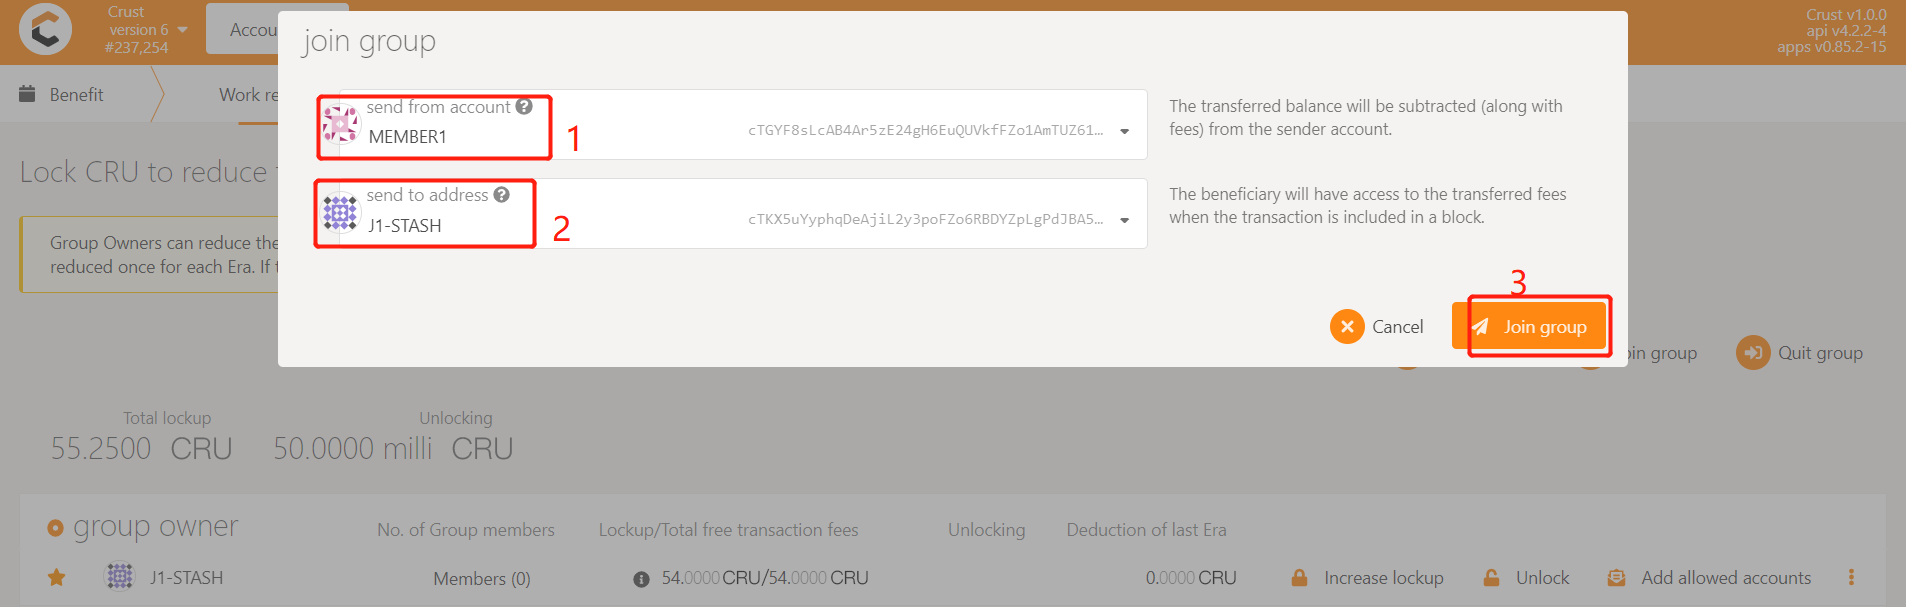
Add the member account that has been added to the whitelist,ensure that the Member node has sent workreport,enter benefits module, and click "Join group"
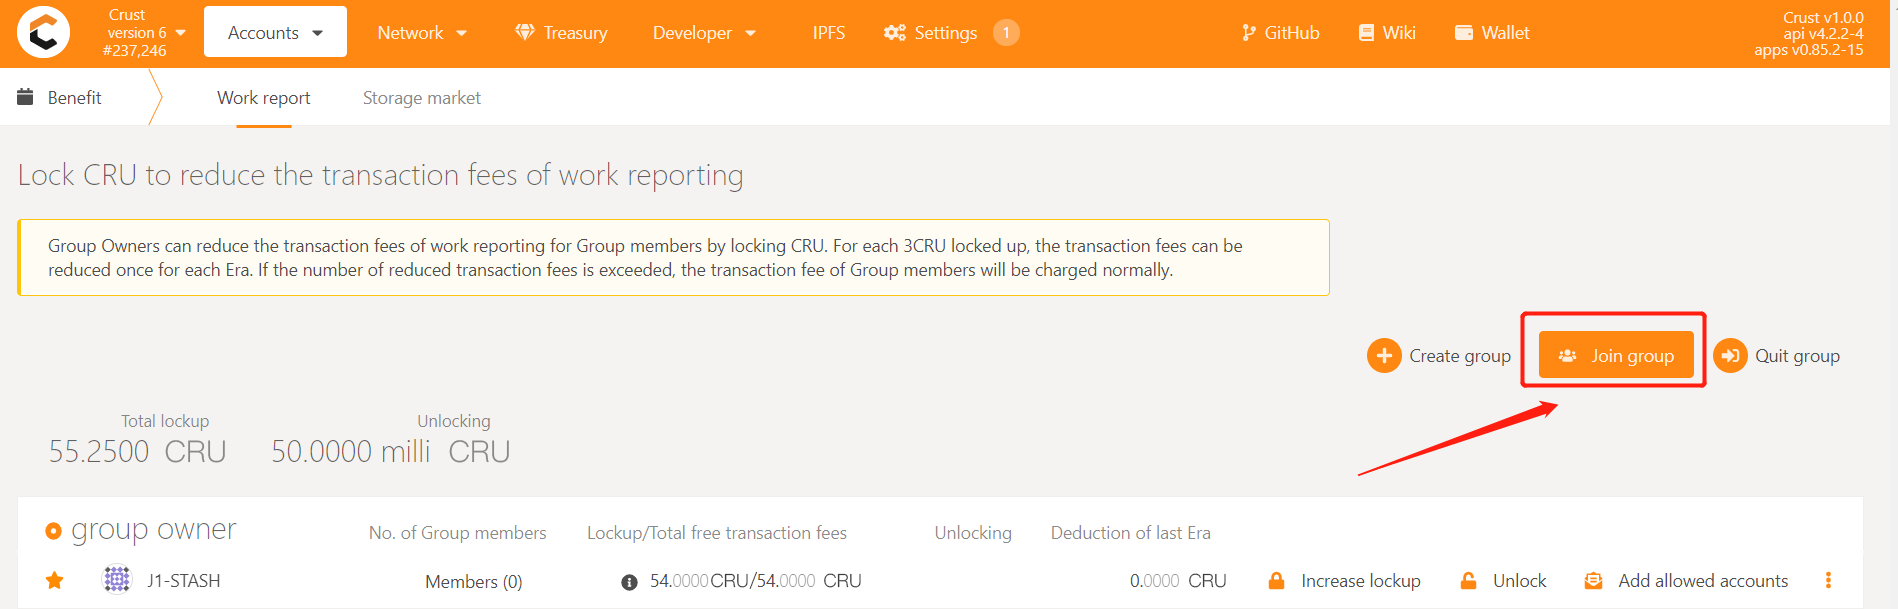
Add the target Member account to the corresponding group, click "Join group"
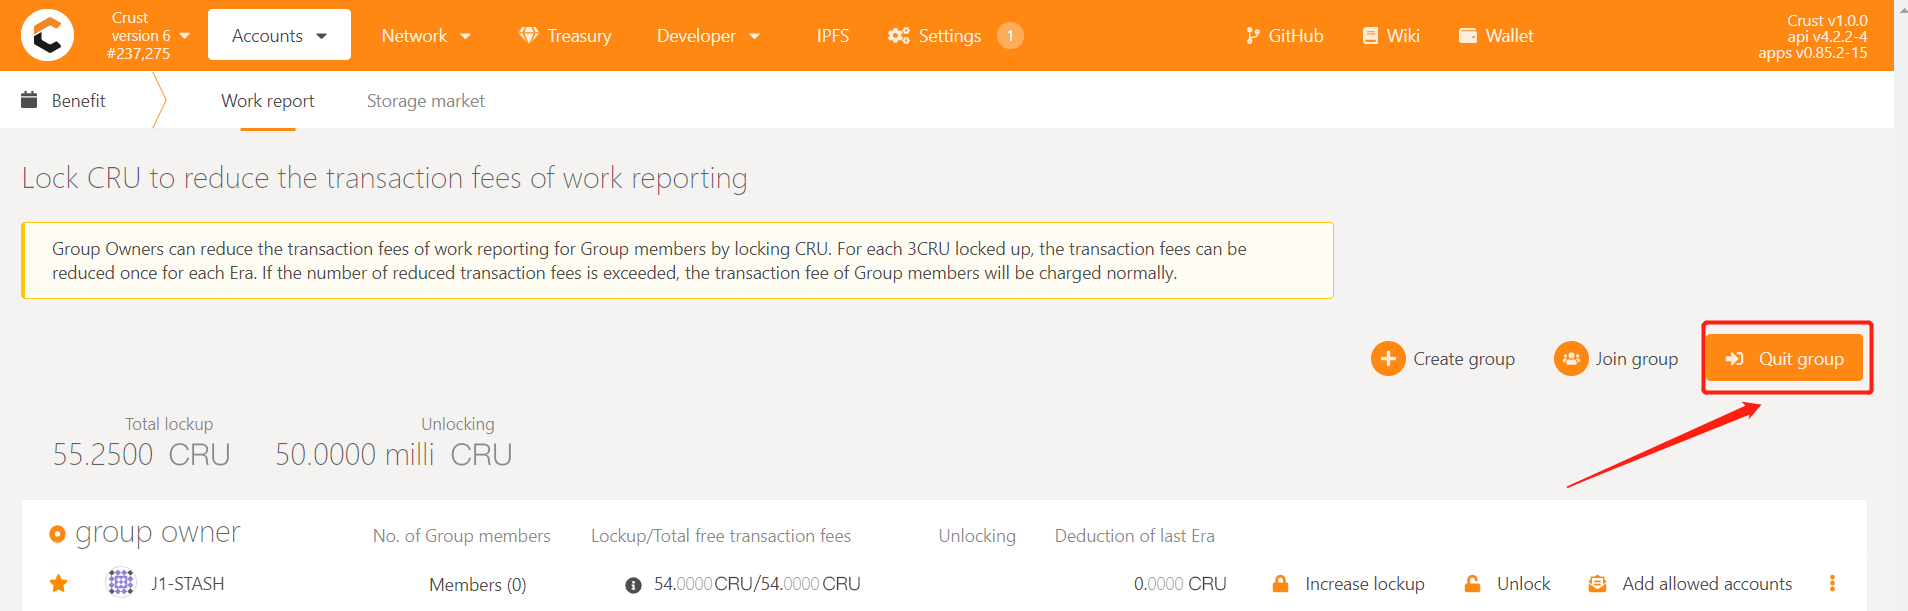
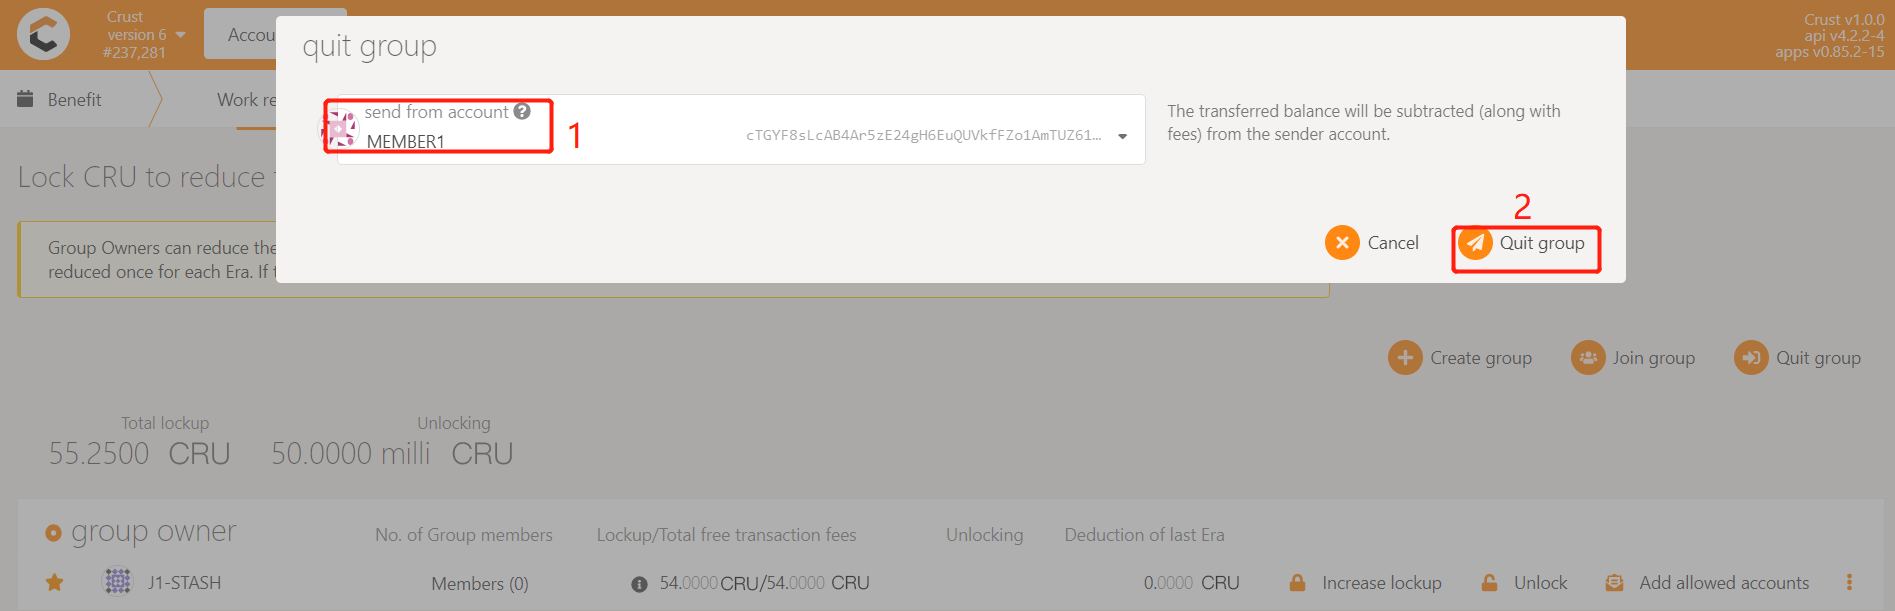
3.2 Quit group
Enter benefits module, click "Quit group", and select the Member account that needs to quit.